Step-by-step: TypingDNA Verify 2FA in Microsoft Entra ID as EAM
TypingDNA Verify 2FA integrates with Microsoft Entra ID, as EAM (External Authentication Method) using OIDC, allowing it to function seamlessly as a two-factor authentication method. The following steps outline the necessary actions:
Prerequisites
Microsoft Entra ID admin accoun
TypingDNA dev/client account (ideally upgraded to Enterprise)
A. On TypingDNA dev/client side:
Add a new OIDC integration under Verify 2FA
B. On Microsoft Entra ID side:
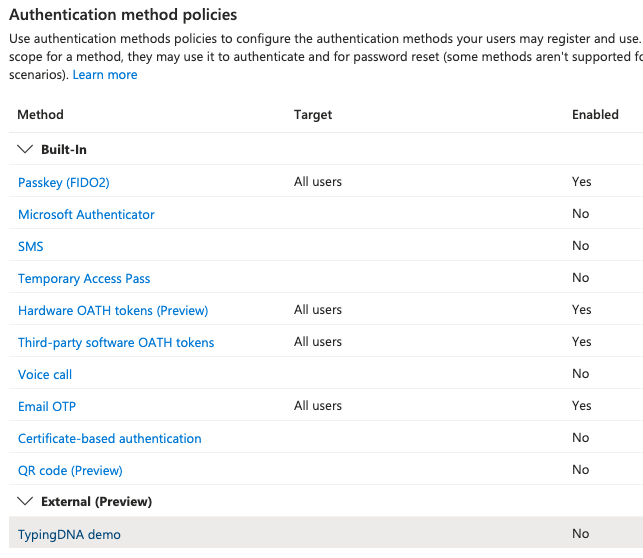
Add TypingDNA Verify 2FA as EAM / Authentication Method
Grant admin permissions
Enable and target settings
Configure conditional access policy
Let's proceed step by step.
Add a new OIDC integration from the TypingDNA side
Note: An upgrade to Enterprise level is ideal to utilize OIDC integration in production since the Starter level is limited to a Sandbox environment with only up to 100 users.
Ensure the Verify 2FA tab is active.
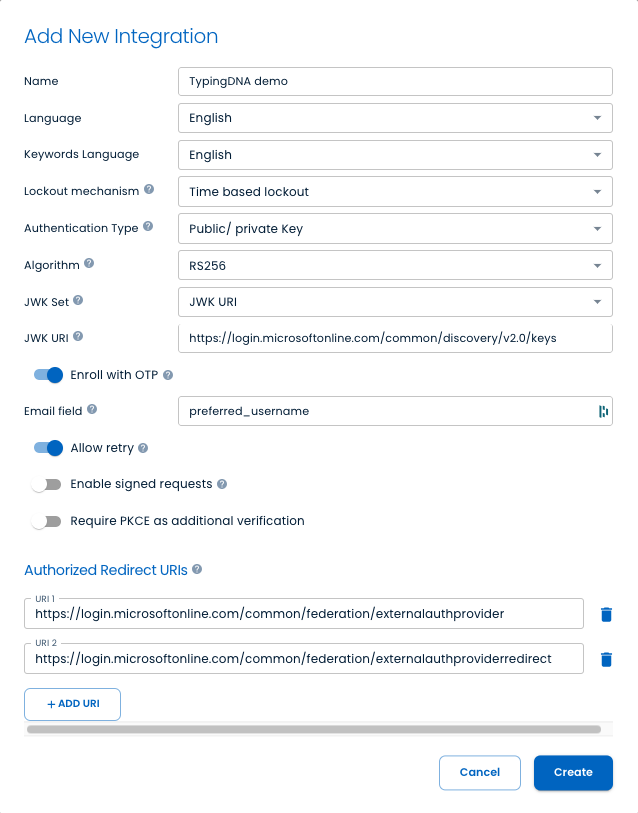
Select Integrations from the left side Menu. In the OIDC integrations panel click +Add new integration.
Name your integration and update the other options as seen in the image below, and click Create:
Note that for Redirect URIs, you have to add both of them:
The Enroll for OTP option is going to use the preferred_username attribute (a MS Entra ID specific attribute) as the email address where to send a one-time-password for finalizing enrollment. Normally this is the official Microsoft Entra ID user email address, but if you are using a different attribute for it, please make sure to type it in the Email field. If this option is not configured correctly it would prevent users from registering. If you're using a different type of implementation or to be able to test the whole integration without it, just turn this feature off.
Please note that NOT all integration settings will work with Microsoft Entra ID, therefore unless you know what you're doing we recommend leaving these settings on default.
With the OIDC integration established in TypingDNA, proceed to the Microsoft Entra ID administration area. Log into https://entra.microsoft.com with an admin user.
Add TypingDNA Verify 2FA as EAM / Authentication Method
First, log into your Microsoft Entra ID administration area. Log into https://entra.microsoft.com with an admin user.
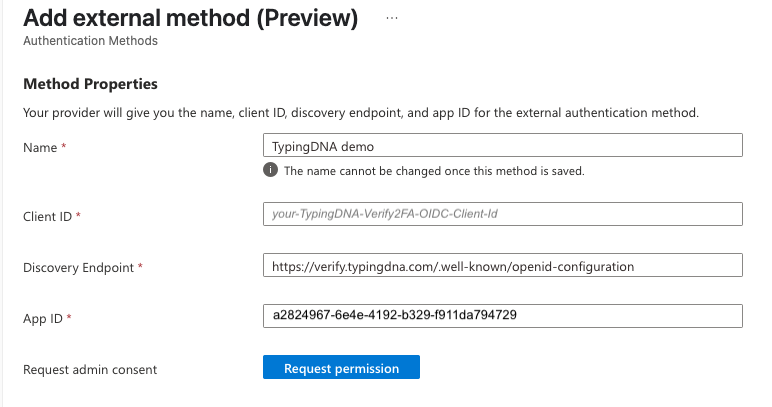
Go to Protection > Authentication methods and click on +Add external method. In the next window, choose a Name, and copy OIDC Client Id from your previous step, from TypingDNA dev account > Verify 2FA > Integrations > OIDC integrations > your-OIDC-Integration > Client details > OIDC Client Id.
And for App ID use: a2824967-6e4e-4192-b329-f911da794729
Grant admin permissions
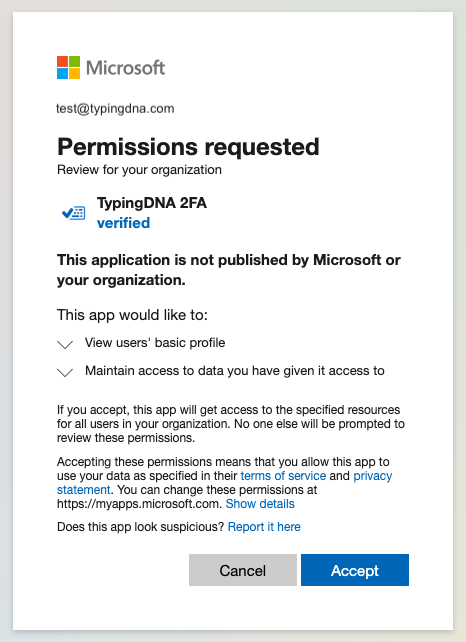
Once you completed the step above you should click the Request permission button. Then accept granting permission to TypingDNA.
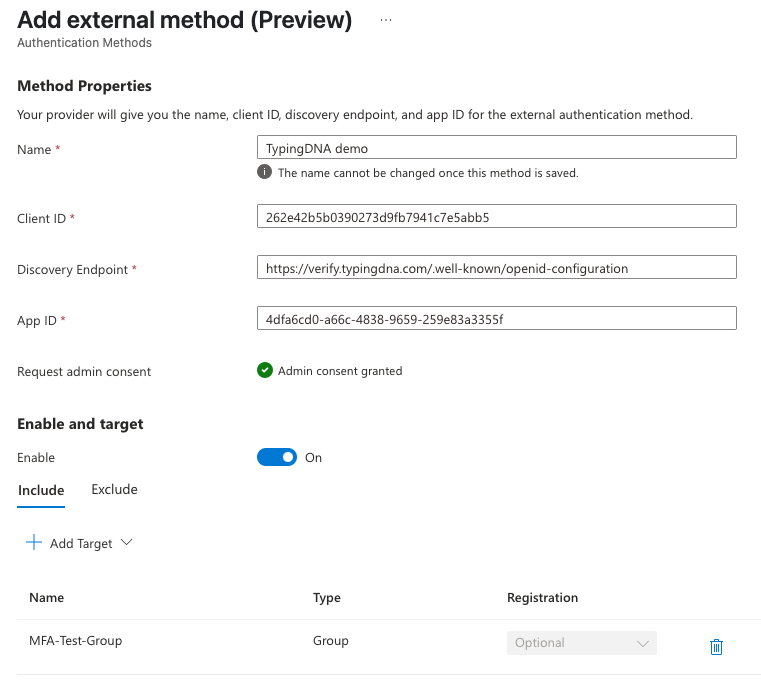
In the Add external method page you should see “Admin consent granted” at this time. You can click Save at any time now. However there are a few things to set up before your users will be able to use TypingDNA as a 2FA method.
Enable and target
Now that you've added the new external method, you should turn Enable On and click +Add Target, then select a group that you want the new authentication method to be included for. We have selected a group called “MFA-Test-Group”, but can be any group and even “All users” as long as you want to allow everyone in your organization to use TypingDNA Verify 2FA.
Now that you configured all these, please click Save one more time and your new EAM should be ready.
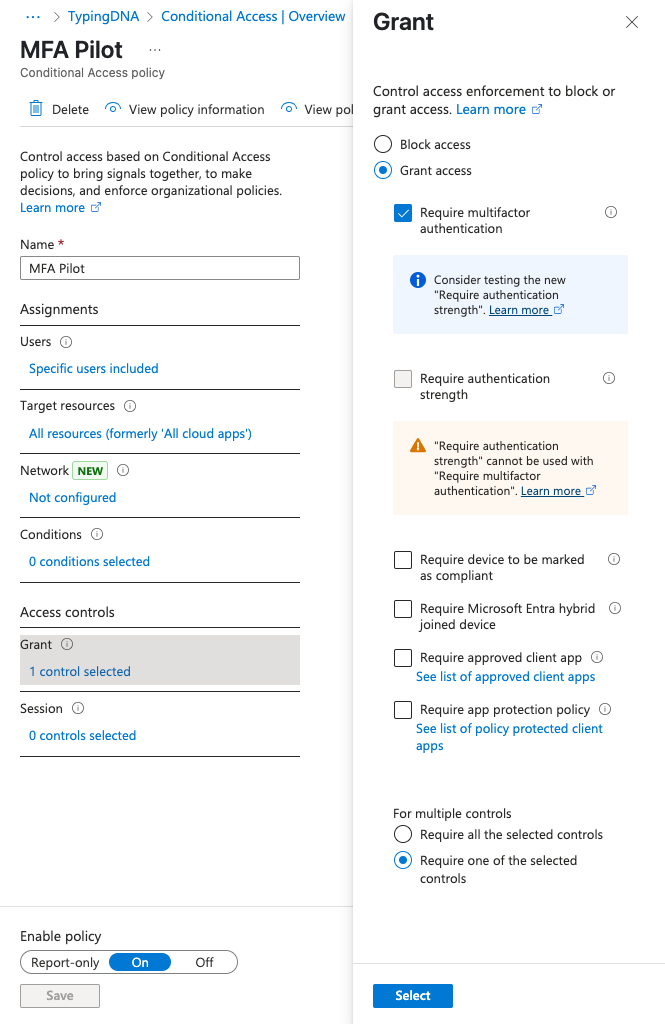
Configure conditional access policy
In order for you to test this method, or any other MFA method, you need to configure “Conditional Access”, more specifically to create a policy for it.
To do so, navigate to Protection > Conditional Access and choose +Create new policy.
The new policy can be almost blank, but you need to make sure it includes the users/groups that you already selected at the previous step, it targets all resources or at least the ones you want to test this app on, and to set the Grant access to Require multifactor authentication as seen in the image below. Then turn Enable policy On, and click Save.
Now, you should be able to use the integration. Try logging with any user that is targeted simply in https://entra.microsoft.com and after introducing the password, go for the TypingDNA option.
Additional permissions
In some cases it is possible that you will need to give additional permissions to the app. In particular if your integration is not working correctly at this point you should make sure that the app has permission to use email, profile and openid.
How does it work for a user?
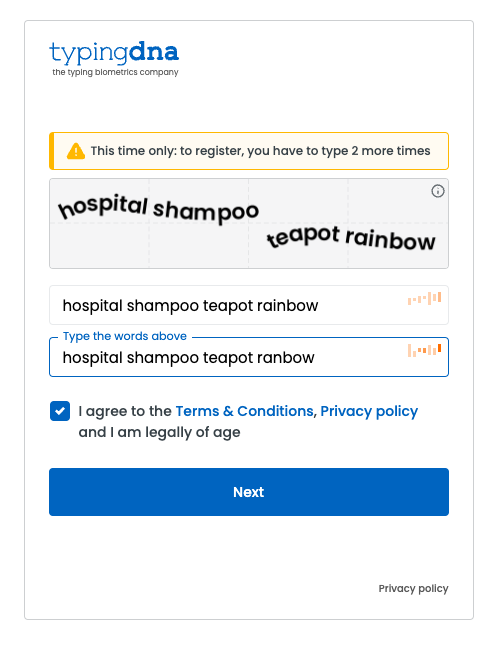
Users will enroll with TypingDNA first time they choose this option. To finalize enrollment they will receive an email with an OTP (One Time Password), which will have to be introduced in the last step to finalize enrollment.
During enrollment, users type a random 4-word combination to create a unique typing pattern to be used in future authentications. An algorithm ensures these words cover the keyboard well enough.
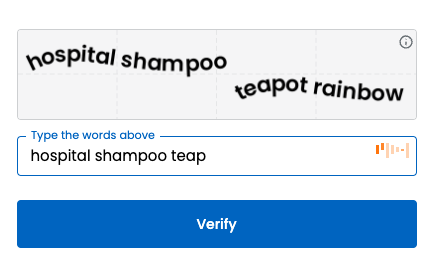
At authentication, the user is simply prompted to type just one time for authentication.
If they fail to authenticate we try a second time and if the user fails again, they are then returned to select a different factor in Microsoft Entra ID. If multiple fails happen, we add progressive time locks, stopping impostors from trying multiple times.
How to reset TypingDNA for a user?
At this time, only a Microsoft Entra ID admin user with access to your TypingDNA dev/client account can reset a TypingDNA user.
Go to your TypingDNAdev/client account, in the Verify 2FA tab and find the OIDC integration that you are using in Microsoft Entra ID. Click the user icon and enter the user's Microsoft Entra ID Object ID in the “Email” field and click Get info. Once the information is retrieved, click Delete User.
Now the user can safely set up TypingDNA again if they choose to.